Quick Tip 03 – iPhone Filmmaking Made Simple: Best Settings for Anyone
iPhone Camera Settings
Want full manual control over shutter angle, ISO, and white balance, just like a cinema camera? No problem.
Prefer to pull your phone out of your pocket and shoot great-looking videos with a single tap? Super easy as well!
That’s the beauty of iPhone filmmaking, you can go super basic or all the way with the same tool in your hand!
There are three levels of difficulty when it comes to iPhone filmmaking:
Beginner, Intermediate, and Advanced.
I will break down the beginner and intermediate settings below. Please check out this post if you are looking for a breakdown of my advanced settings.
Just pick the level that feels right for you, copy the settings, and start shooting!
Beginner
If you just want to pull out your iPhone and capture the best possible video quality with one tap, just copy the settings below, no deep tech knowledge required. Just set it and forget it.
Start by opening your Camera Settings and selecting Formats. By default, most iPhones are set to High Efficiency, switch this to Most Compatible.
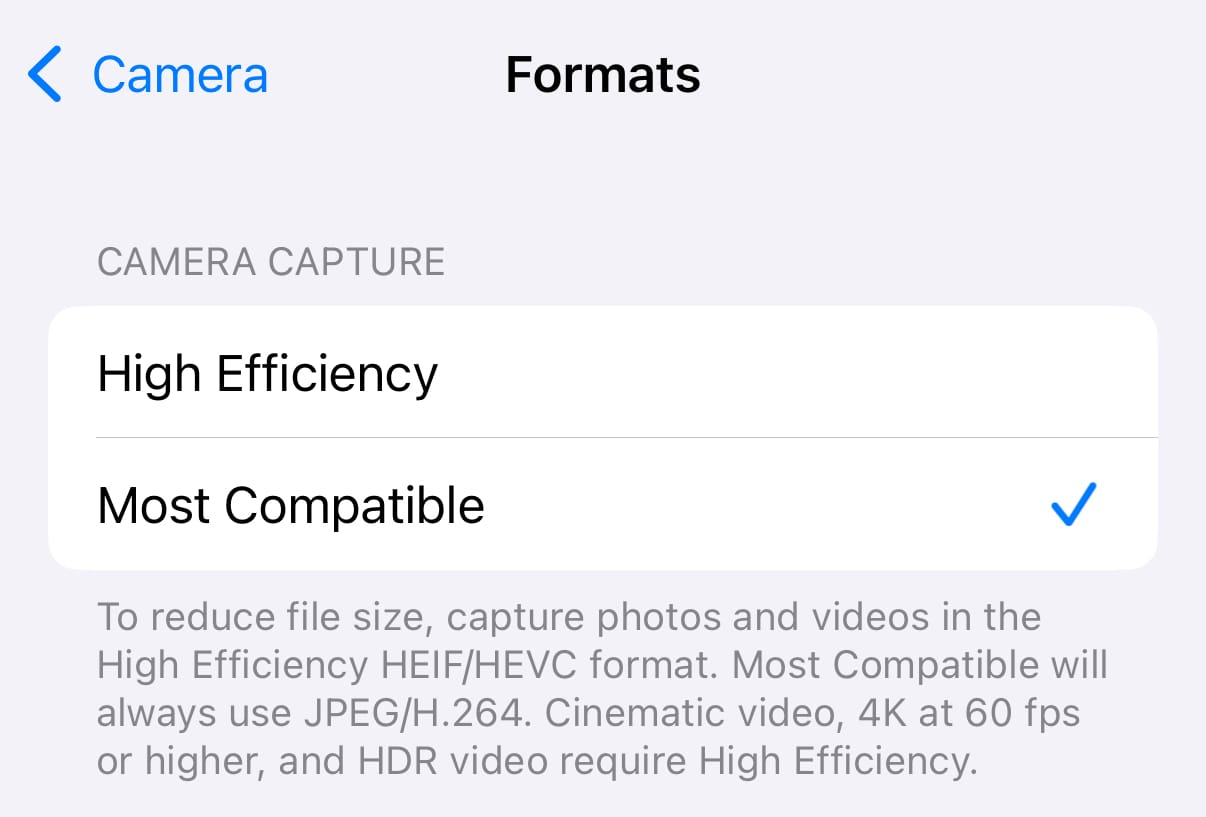
Format setting
Next, go back into Camera Settings and scroll down until you find Grid, then switch it on.
This will add a grid overlay to your screen, making composition much easier. Simply place your subject along one of the four intersection points, this is called the Rule of Thirds, one of the simplest ways to instantly make your videos look more professional (and it works for photos too!). A more in depth episode on composition is coming soon.
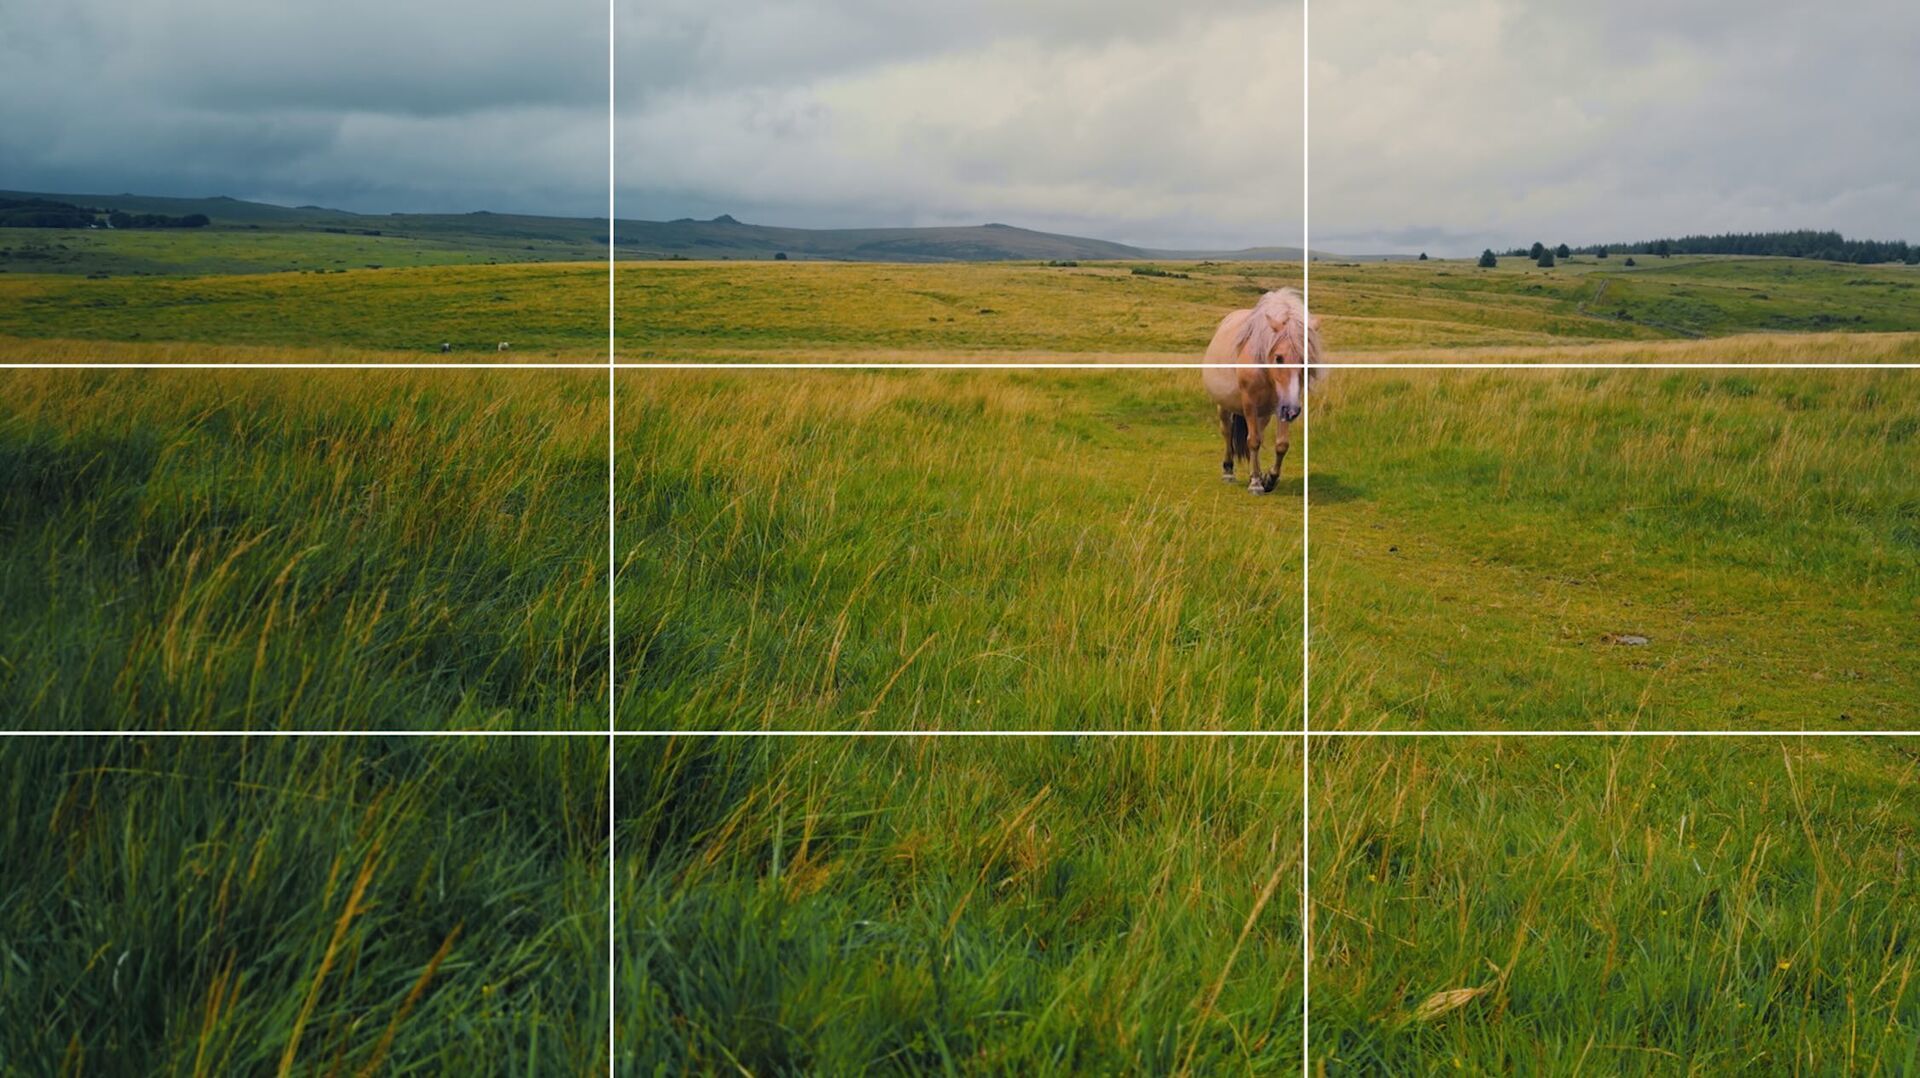
Rule of Thirds example
For resolution and frame rate, I recommend 1080p HD at 60fps. This gives you smooth motion, excellent quality, and smaller file sizes that won’t fill up your iPhone storage too quickly.
Want extra flexibility for editing? Switch to 4K, this allows you to crop or reframe without losing too much quality. Just keep in mind that 4K files are much larger and take up storage quickly.
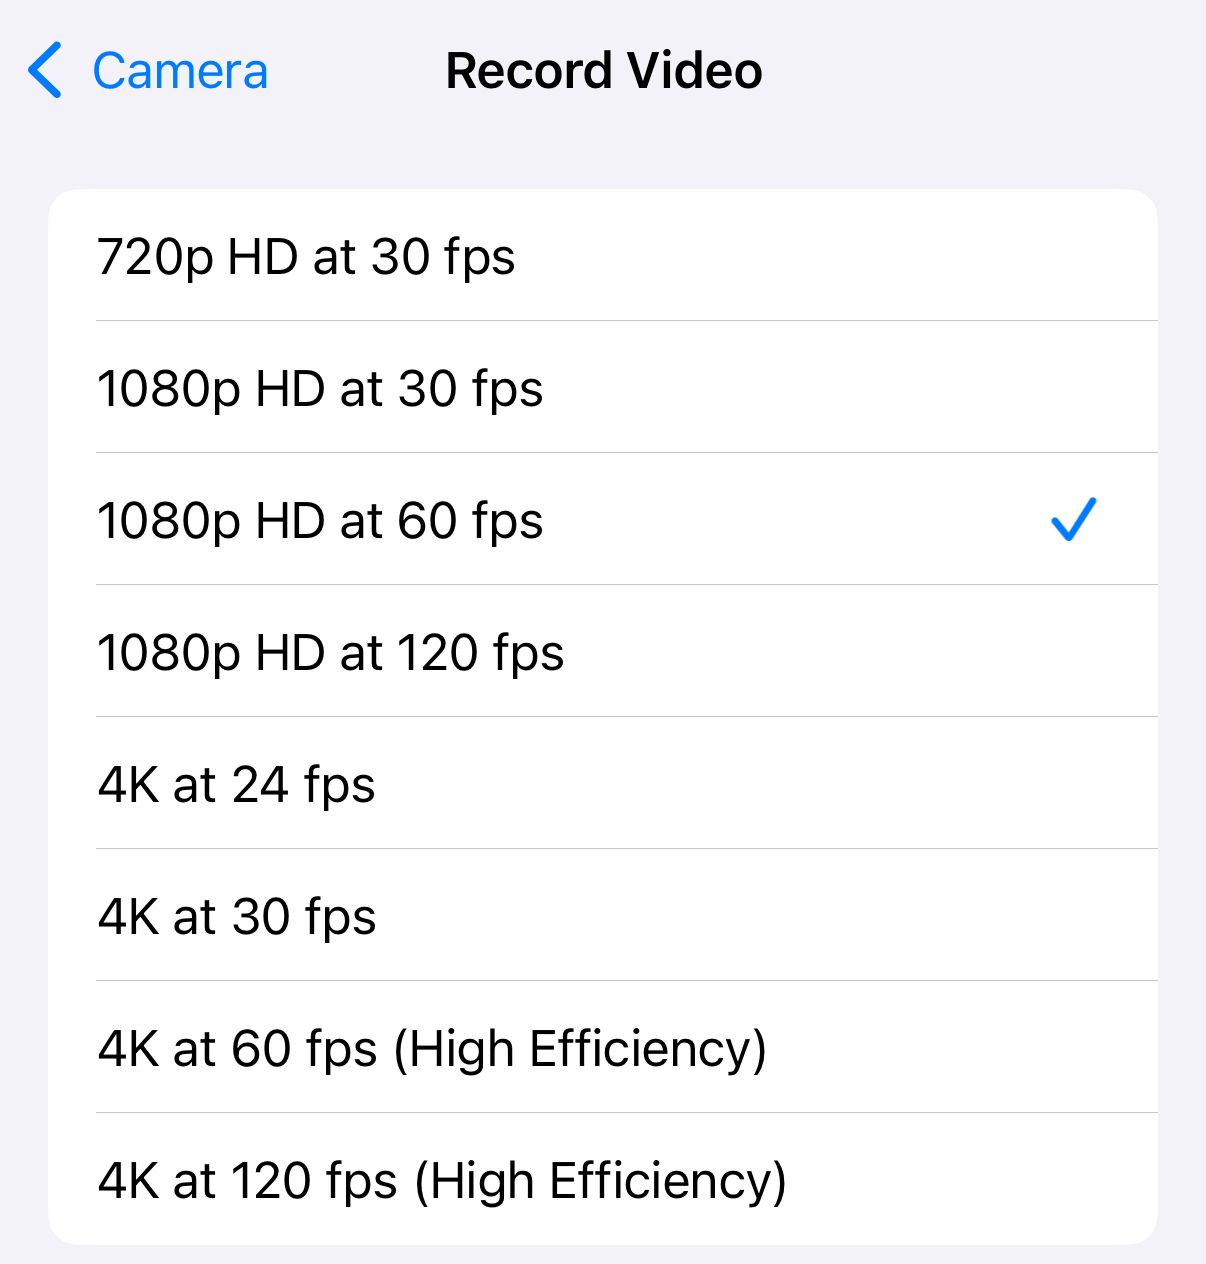
Recording settings
Now scroll further down and adjust the following settings. The most important ones are the last two, you want to keep these enabled so nothing changes in the midst of filming.
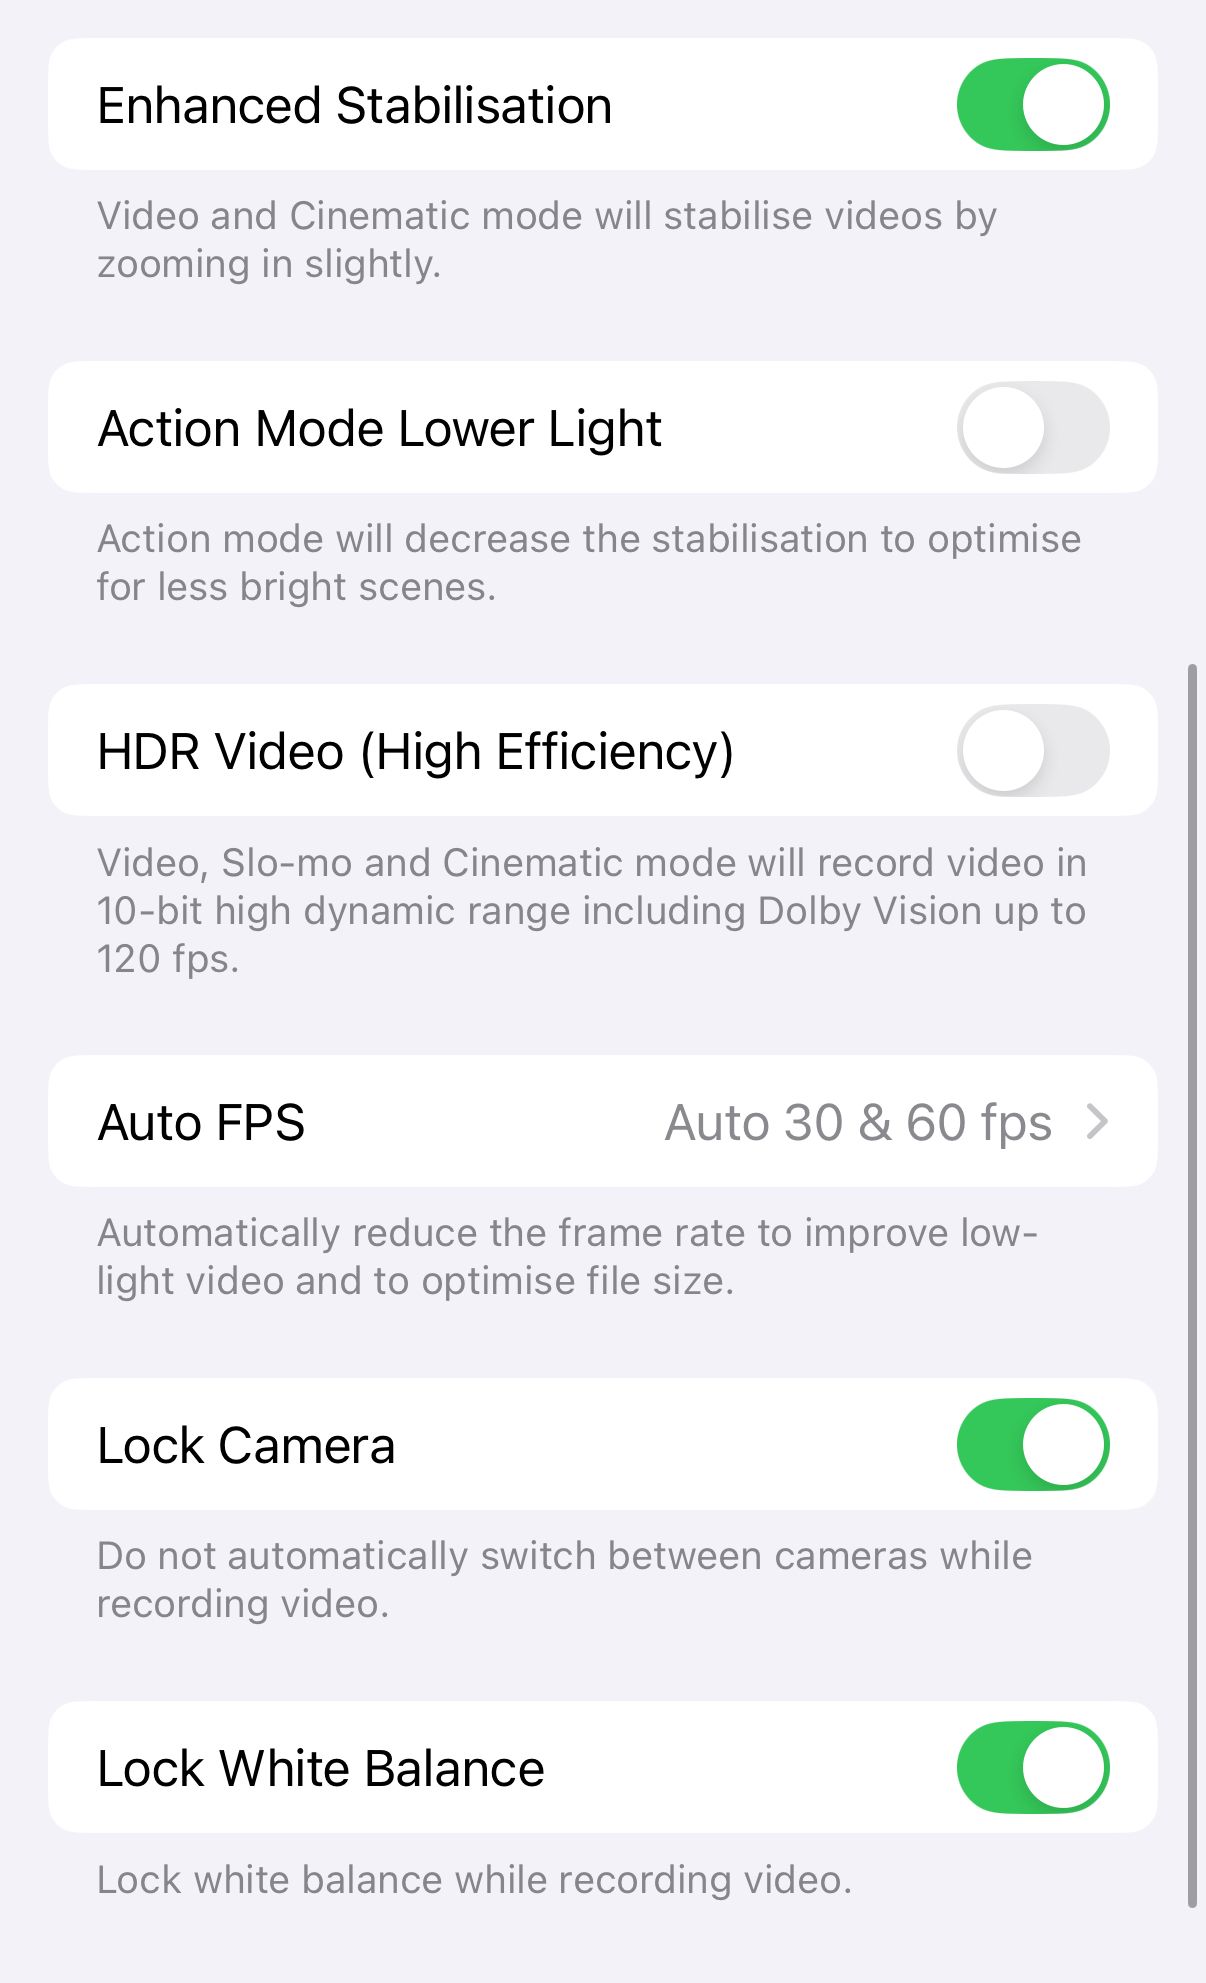
Keep Lens Correction enabled. Especially important if you use the wide angle lens regularly.

Lens Correction enabled
A neat trick while filming is to tap and hold the screen. You’ll see “AE/AF Lock” appear at the top, this locks your exposure and focus for the entire shot. It’s a simple but crucial step for keeping your videos looking professional and high-quality.
Just tap and hold the main subject you want in focus and properly exposed with your finger and wait until the “AE/AF Lock” sign appears.
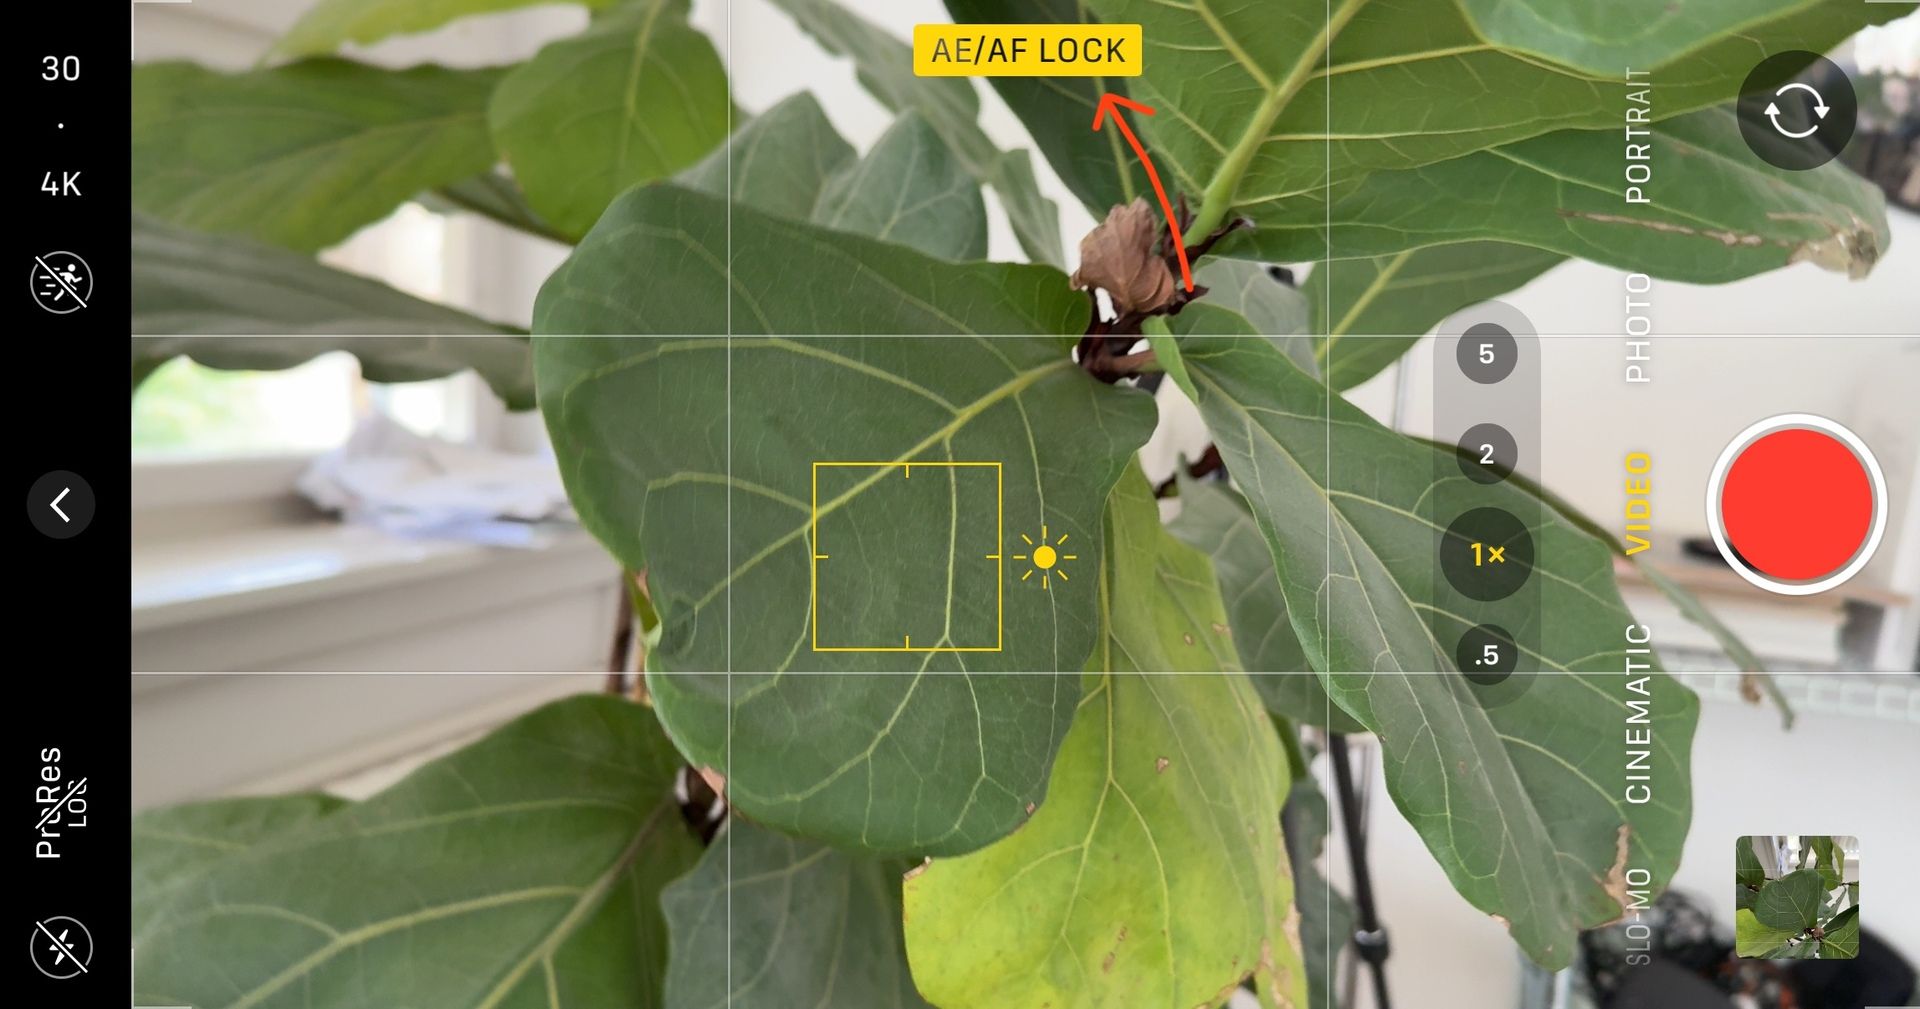
AE/AF Lock after tapping and holding the screen
That’s it, you’re done!
Disclaimer: All screenshots are from my iPhone 16 Pro, it works exactly the same on older models too! I have my 12 Mini set up the same way.
Intermediate
For those who want a bit more control because they edit their videos themselves, the following settings work best. They strike the perfect balance between high-quality footage and ease of use.
(Only possible on iPhone 15 Pro and iPhone 16 Pro!)
Go to Camera Settings, tap Format, then scroll down to Video Capture. Enable Apple ProRes and select LOG for “ProRes Encoding.”
Disclaimer: Shooting in ProRes produces very large files! If you run low on storage or don’t need maximum image quality, you can skip this and stick with H.264 as mentioned above.
My workflow with big files is: Shoot - Offload to laptop - Delete.
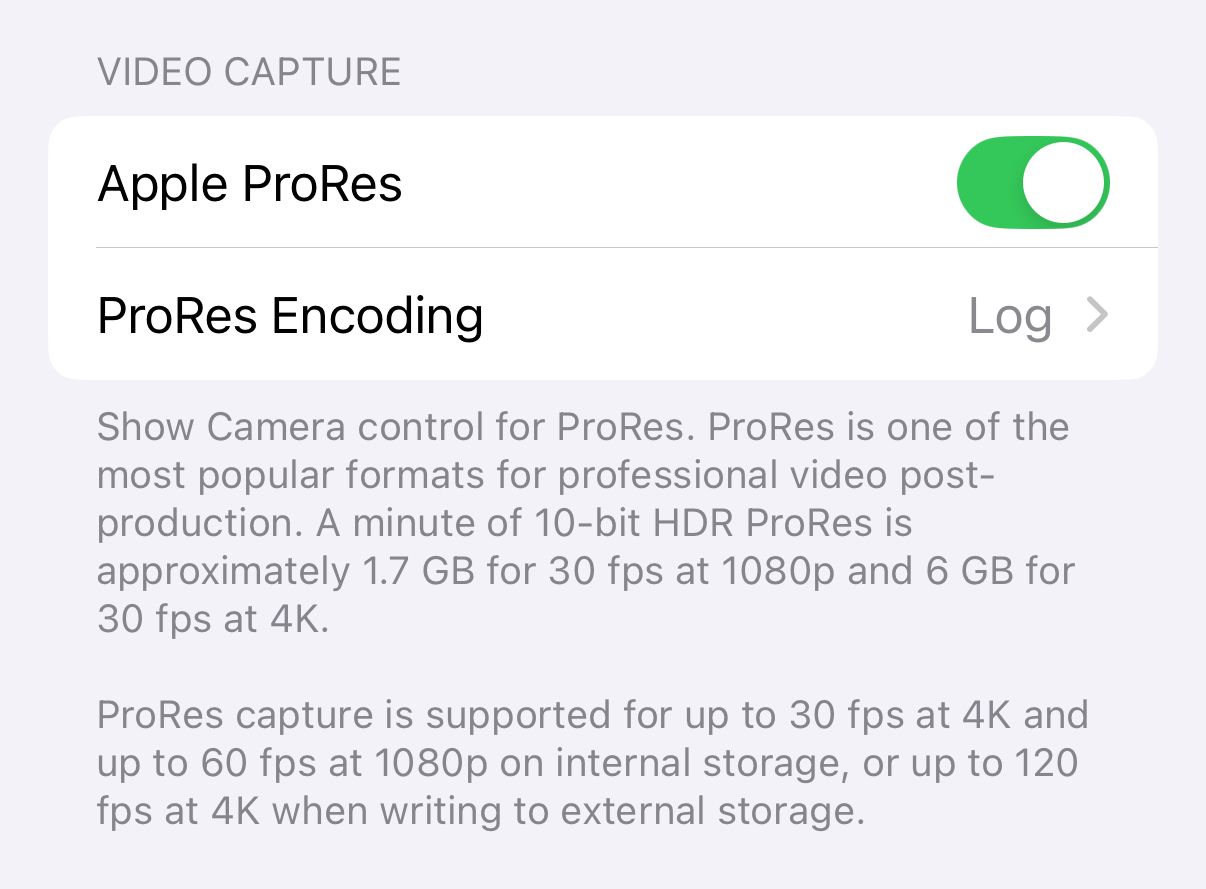
ProRes and LOG enabled in settings
Whenever you’re in the Camera app, you can now choose between Rec.709 for high-quality, ready-to-use footage, or a flat LOG color profile for maximum flexibility in the edit. Just tap the “ProRes Log” button in the corner.
Keep in mind: shooting in LOG requires some editing experience to get good results. You can check out my exact editing process in this post.
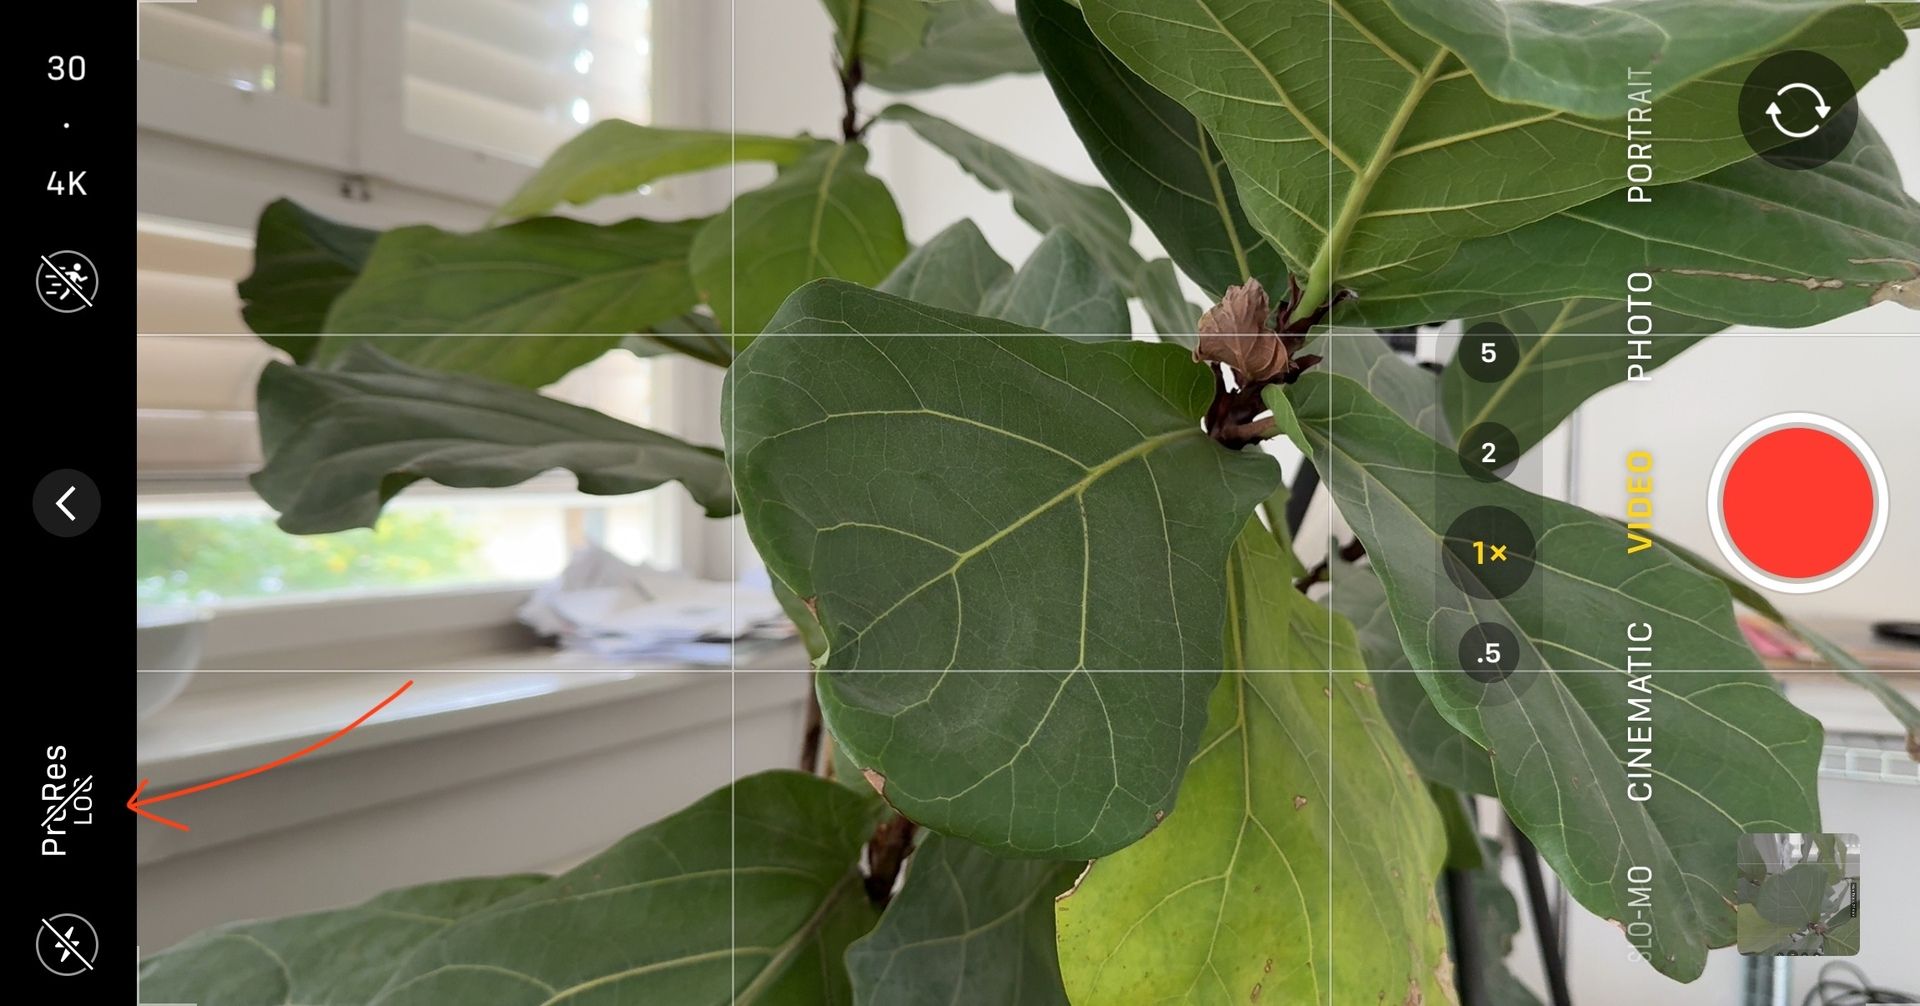
LOG color profile disabled
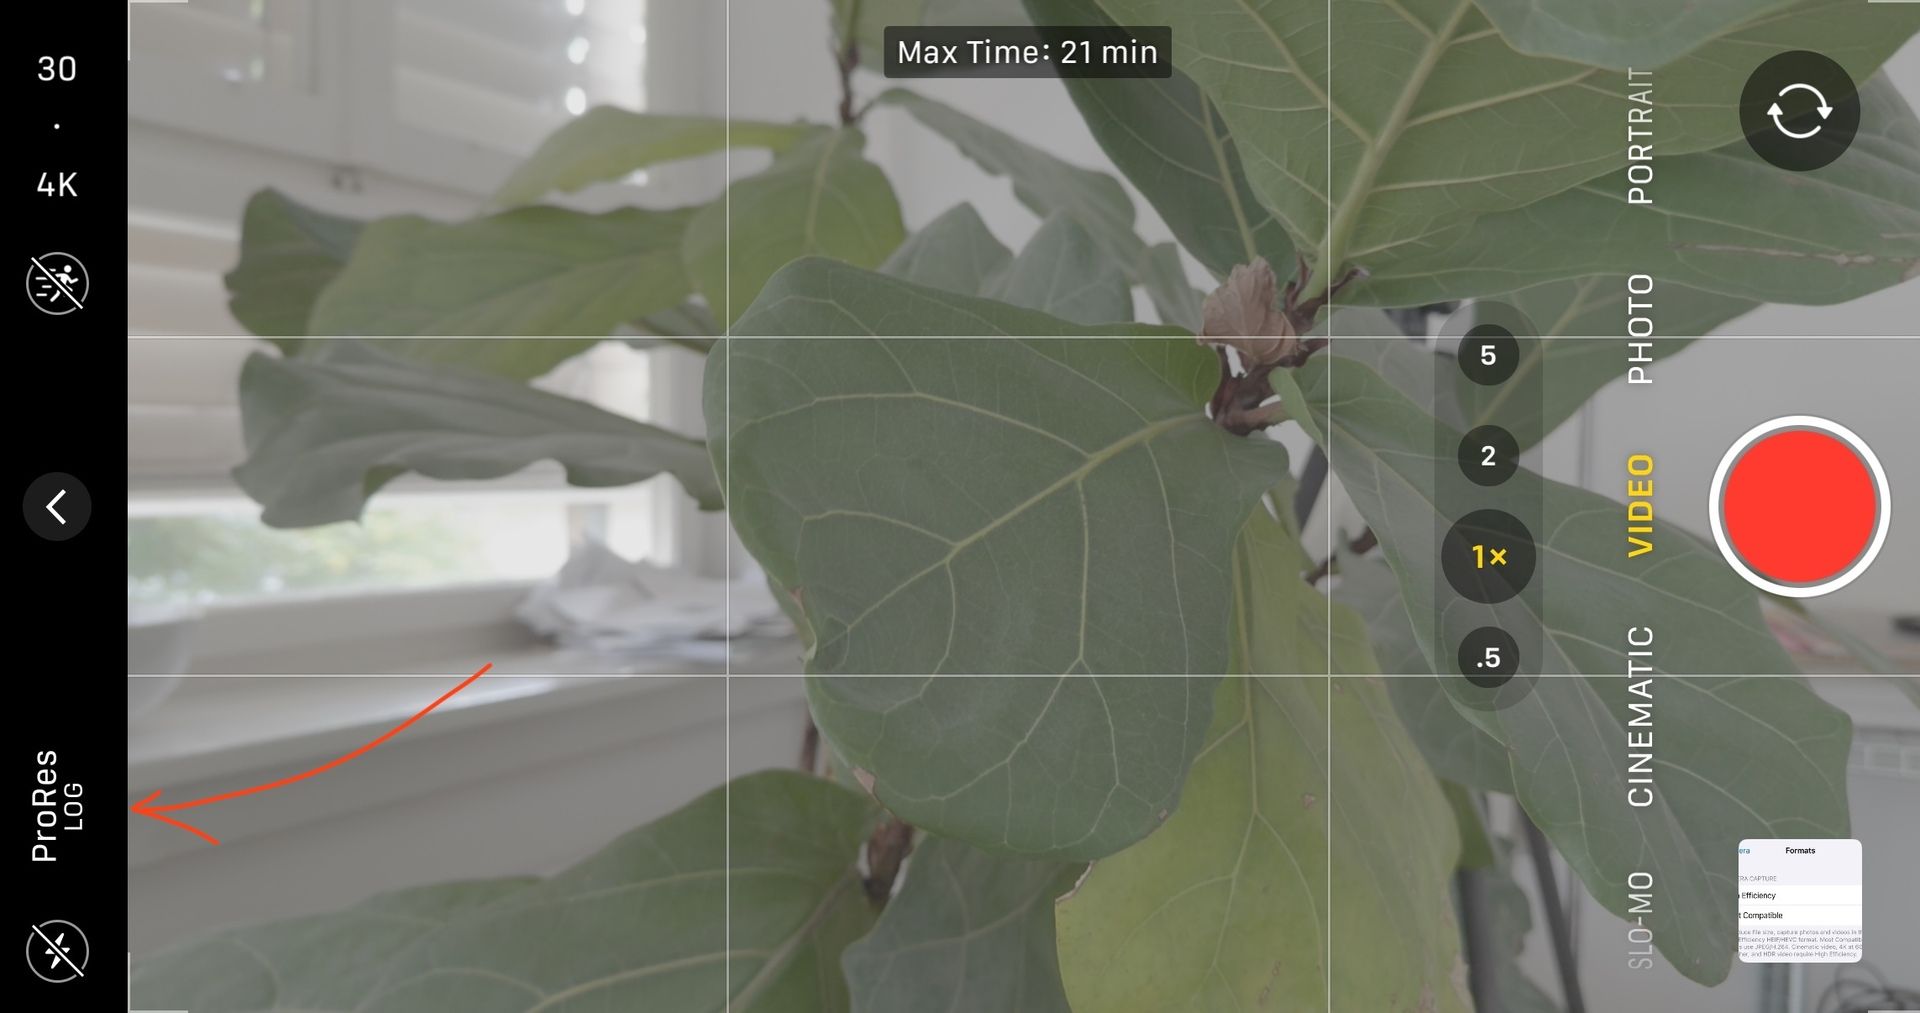
LOG color profile enabled
If you do have enough storage space I would recommend shooting in 4k 30 or 60FPS. I like having the possibility of cropping/reframing in the edit. 1080p is perfectly fine tho!
Advanced
If you are interested in my advanced camera settings, check out my latest post. Got a detailed breakdown of my exact iPhone settings with the Blackmagic Camera app!
Gear
Music & SFX
Looking for the perfect music or premium sound effects for your project?
Check out Musicbed! I get everything I need from them, so if you want to try it out yourself, you can sign up for the free 14-day trial below!
I’ve even got a playlist if you want to check out the music I use for my edits!
A Final Note
Thanks so much for being here, I genuinely appreciate every single reader.
If you ever have questions or ideas for future issues, feel free to shoot me a DM on Instagram!
Until next time,
Stefan
Minimal tools. Maximum creativity.
This post contains affiliate links, using them supports this newsletter at no extra cost to you. Win–win. 🫶🏼
