Shot Breakdown 10
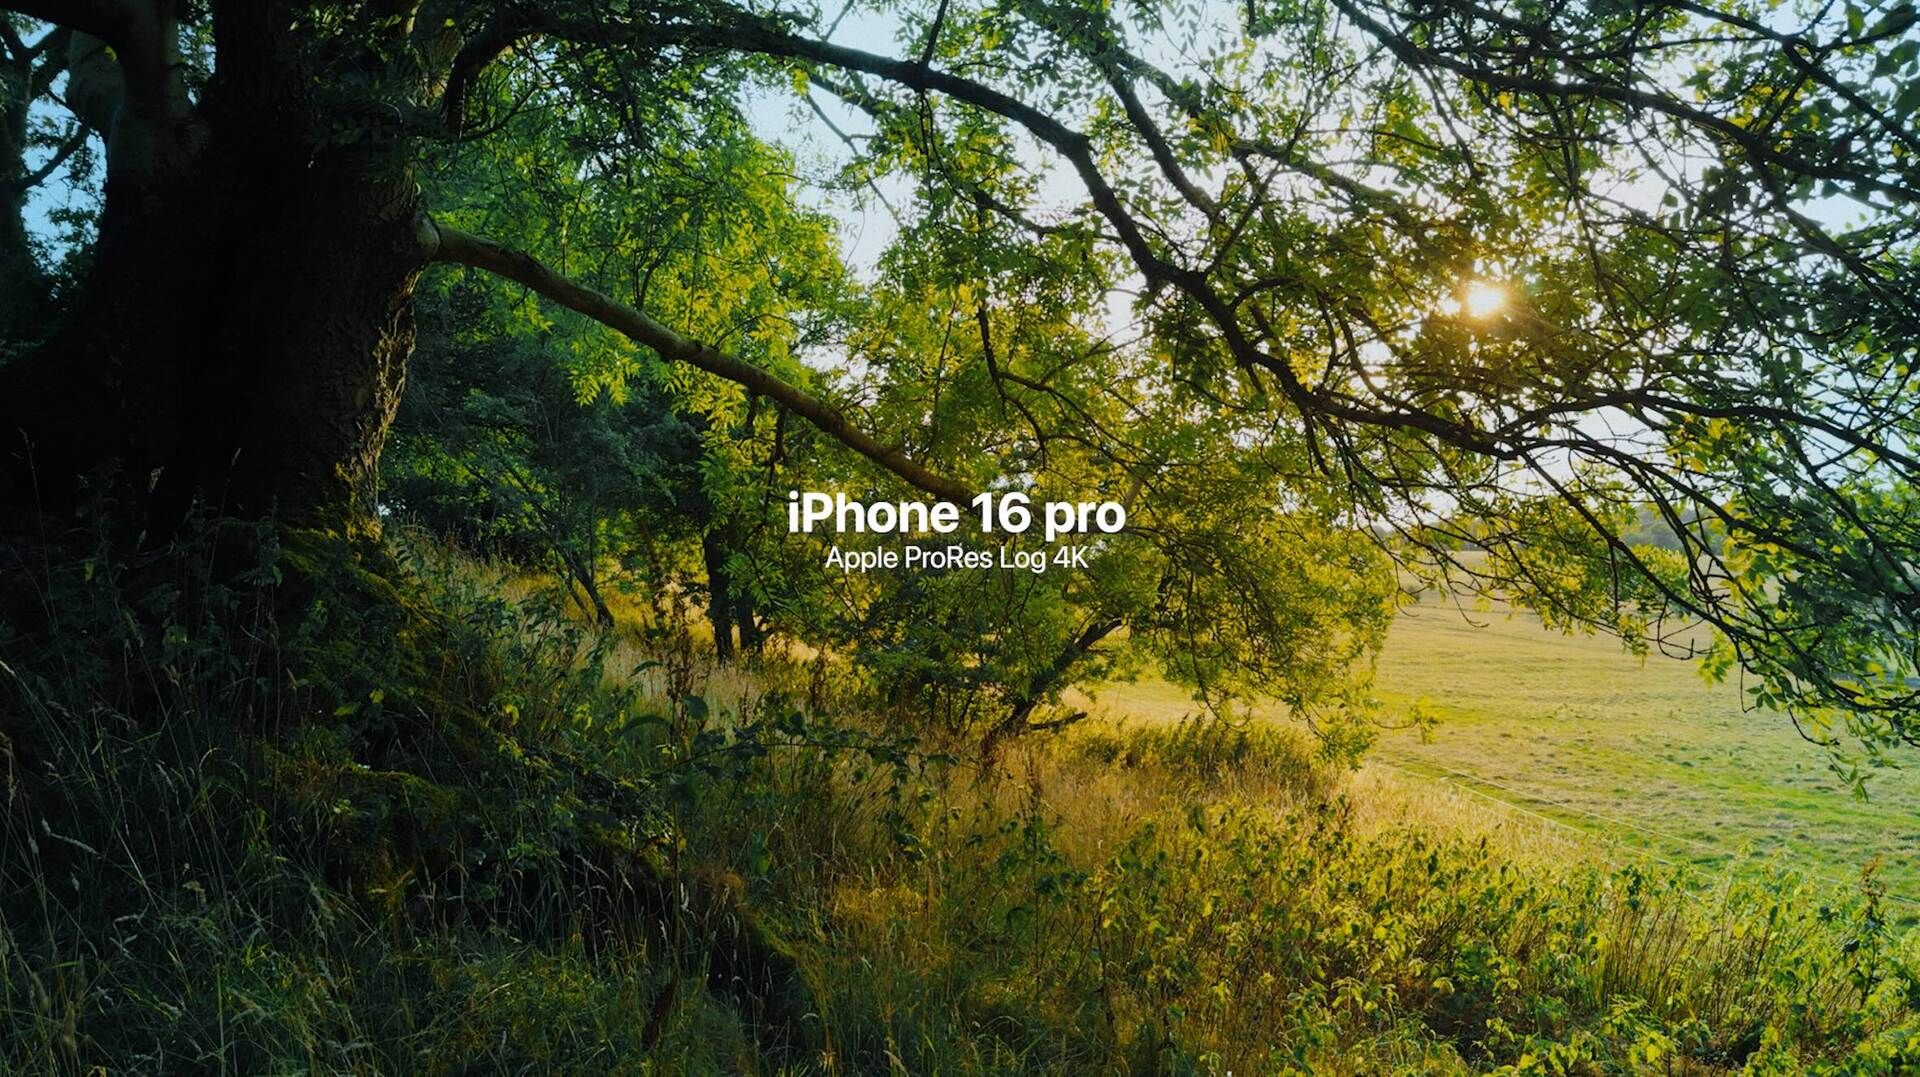
Dancing leaves during sun set.
My Filming Process
This shot is more therapy than anything else to me. At this point, it might even be a full-blown addiction haha. I simply can’t walk past the following combination:
Wind
Trees
Low sunlight
What’s better than the soft rustle of leaves in a summer breeze with the sun setting right behind them? If you ask me, not much.
For this shot, my fiancée and I specifically set out to capture the rolling Cotswolds landscape in the warm glow of a summer sunset. And honestly, full credit goes to her. I had already turned around, disappointed with what I thought were failed attempts, staring at my phone in frustration.
Then she tapped me on the shoulder and pointed me toward this scene. I didn’t hesitate, jumped the electric fence and took the shot.
Sometimes the best frames aren’t found by trying harder, but by being open enough to notice them when they quietly appear.
Lighting
Most people will tell you to always shoot with full backlight whenever possible, and in many cases, that’s great advice. But when shooting on an iPhone, I usually try to avoid extremely high-contrast scenes. This frame is a bit of an exception. As you can see, the sun is positioned directly behind the tree, creating classic backlighting.
What made this work for me was the low sun angle, which softened the contrast significantly, and the slightly translucent leaves that allowed light to pass through. Together, they created a balance of softer contrast and beautiful texture, a win-win in my book.
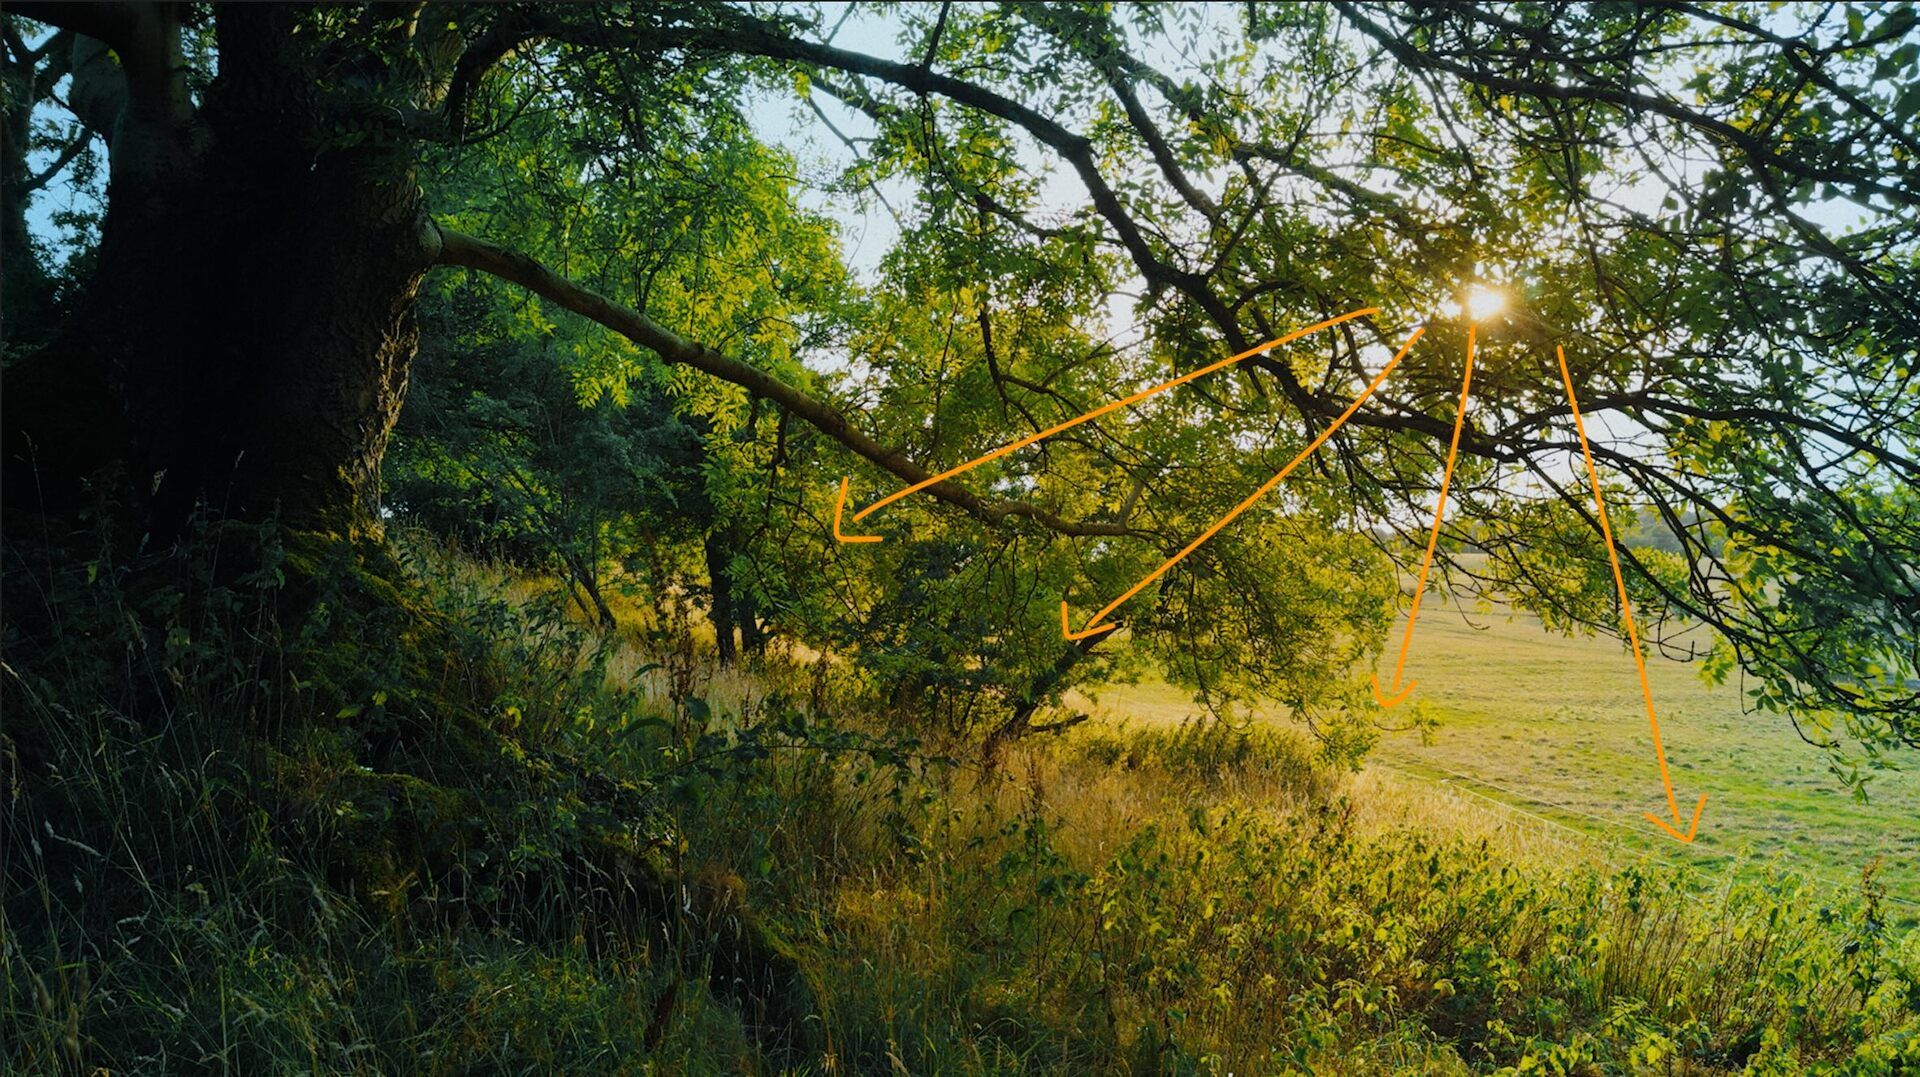
Natural light streaming through the leaves visualised.
Composition
The composition here was more abstract and harder to find. I positioned the tree trunk along the left edge of the frame so its branches would naturally guide the eye toward the small opening. That organic flow, combined with the gradual shift in contrast toward the gap, leads the viewer’s gaze exactly where I intended, into the lower-right part of the frame.
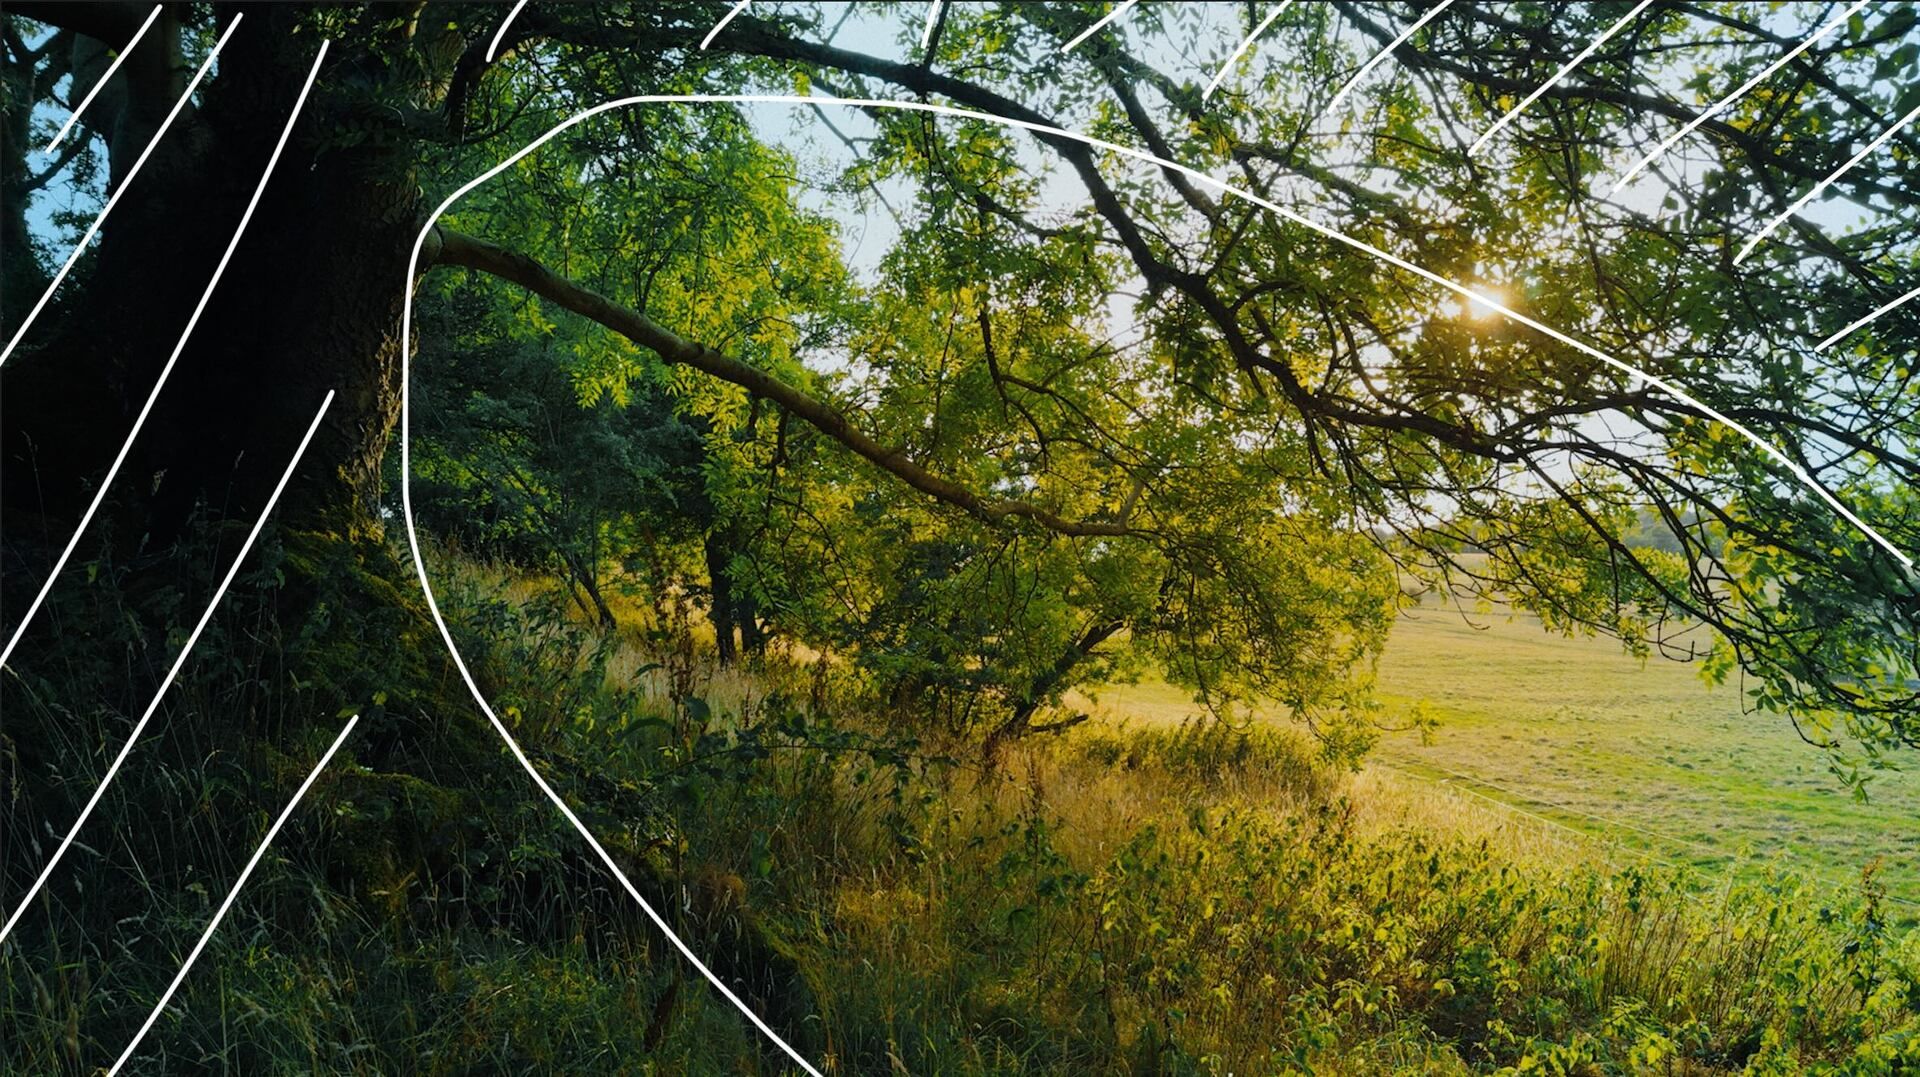
Composition visualised.
My Editing Process
Color Grading
Once again my starting point was the Apple LOG color profile. Read more about my camera settings here!
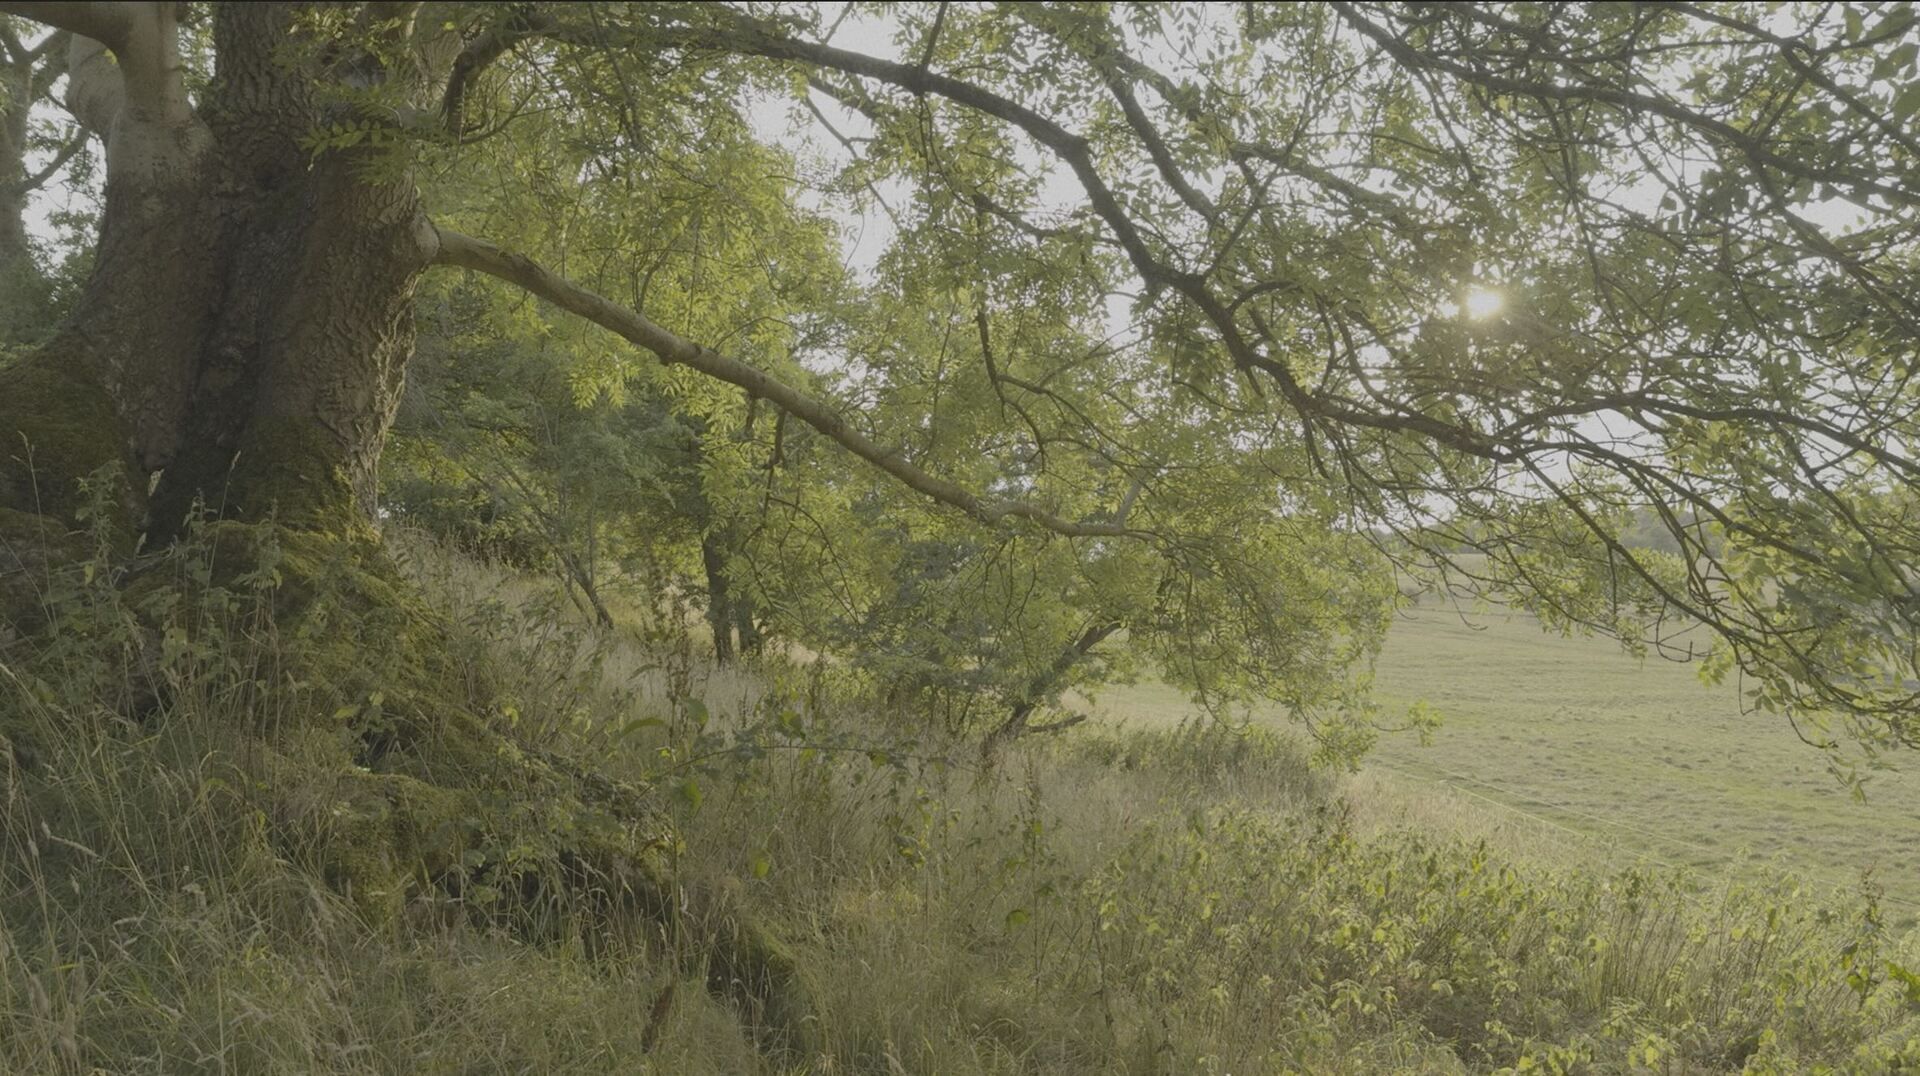
LOG without editing (exact settings below)
I continued by adding my LUT and doing my routine exposure, saturation and white balance correction. I knew that the image was quite a bit too warm for my taste but instead of reducing the overall warmth I decided to change it by using masks.

Added LUT, adjusted WB and contrast correction.
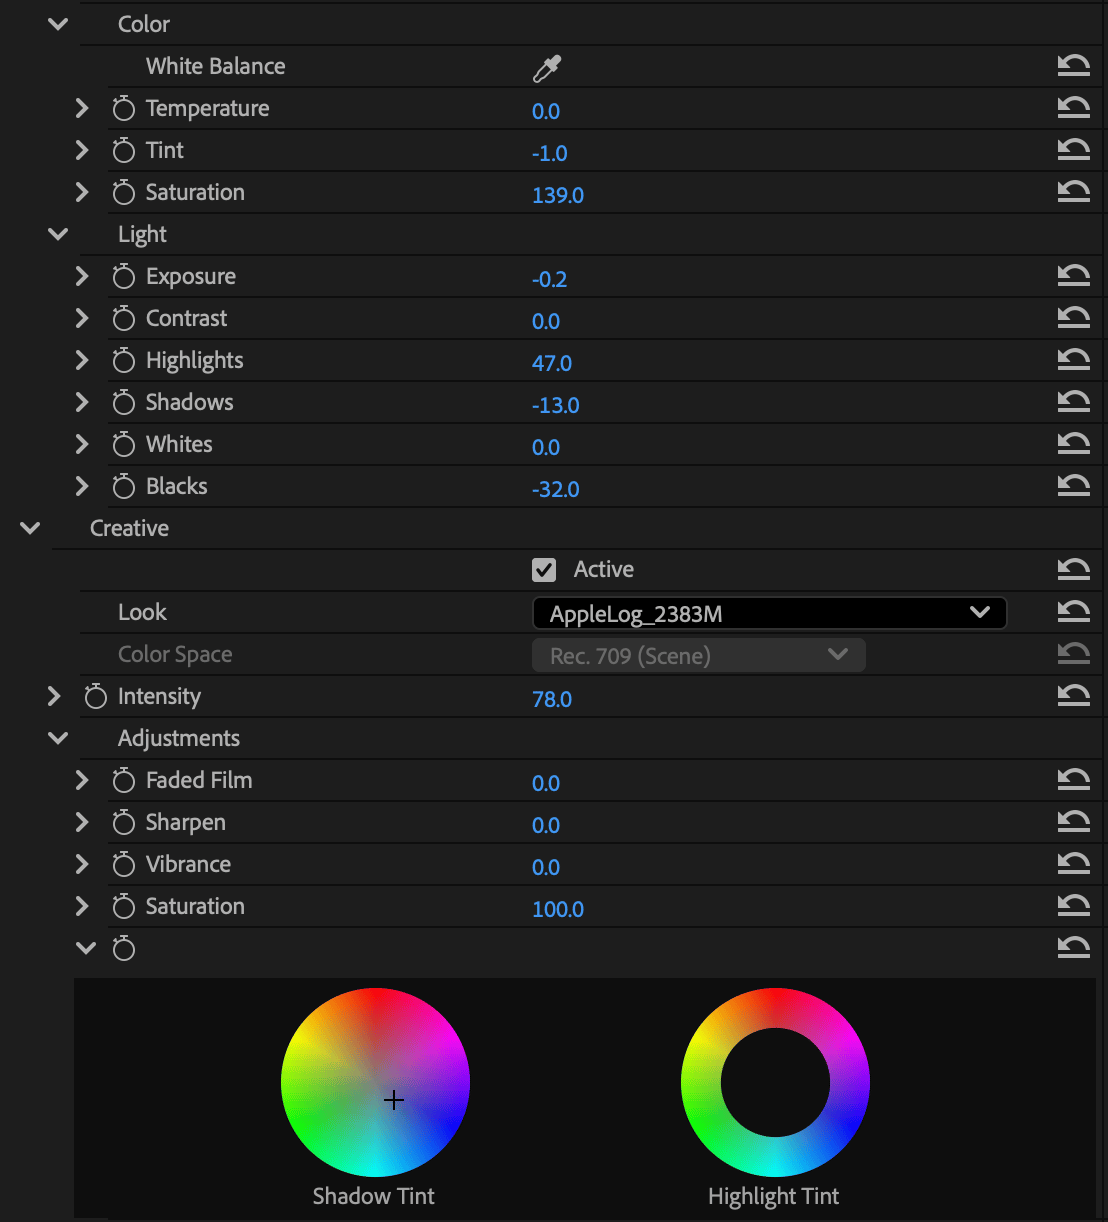
Premiere Pro settings.
I applied a general vignette mask, as shown below, and significantly reduced both warmth and exposure. This pushed the image into a slightly over-stylized look, but for this frame, it felt right.
To lean into that mood even further, I added another mask over the tree trunk and lowered its exposure, enhancing the contrast and giving the image an even more dramatic finish.
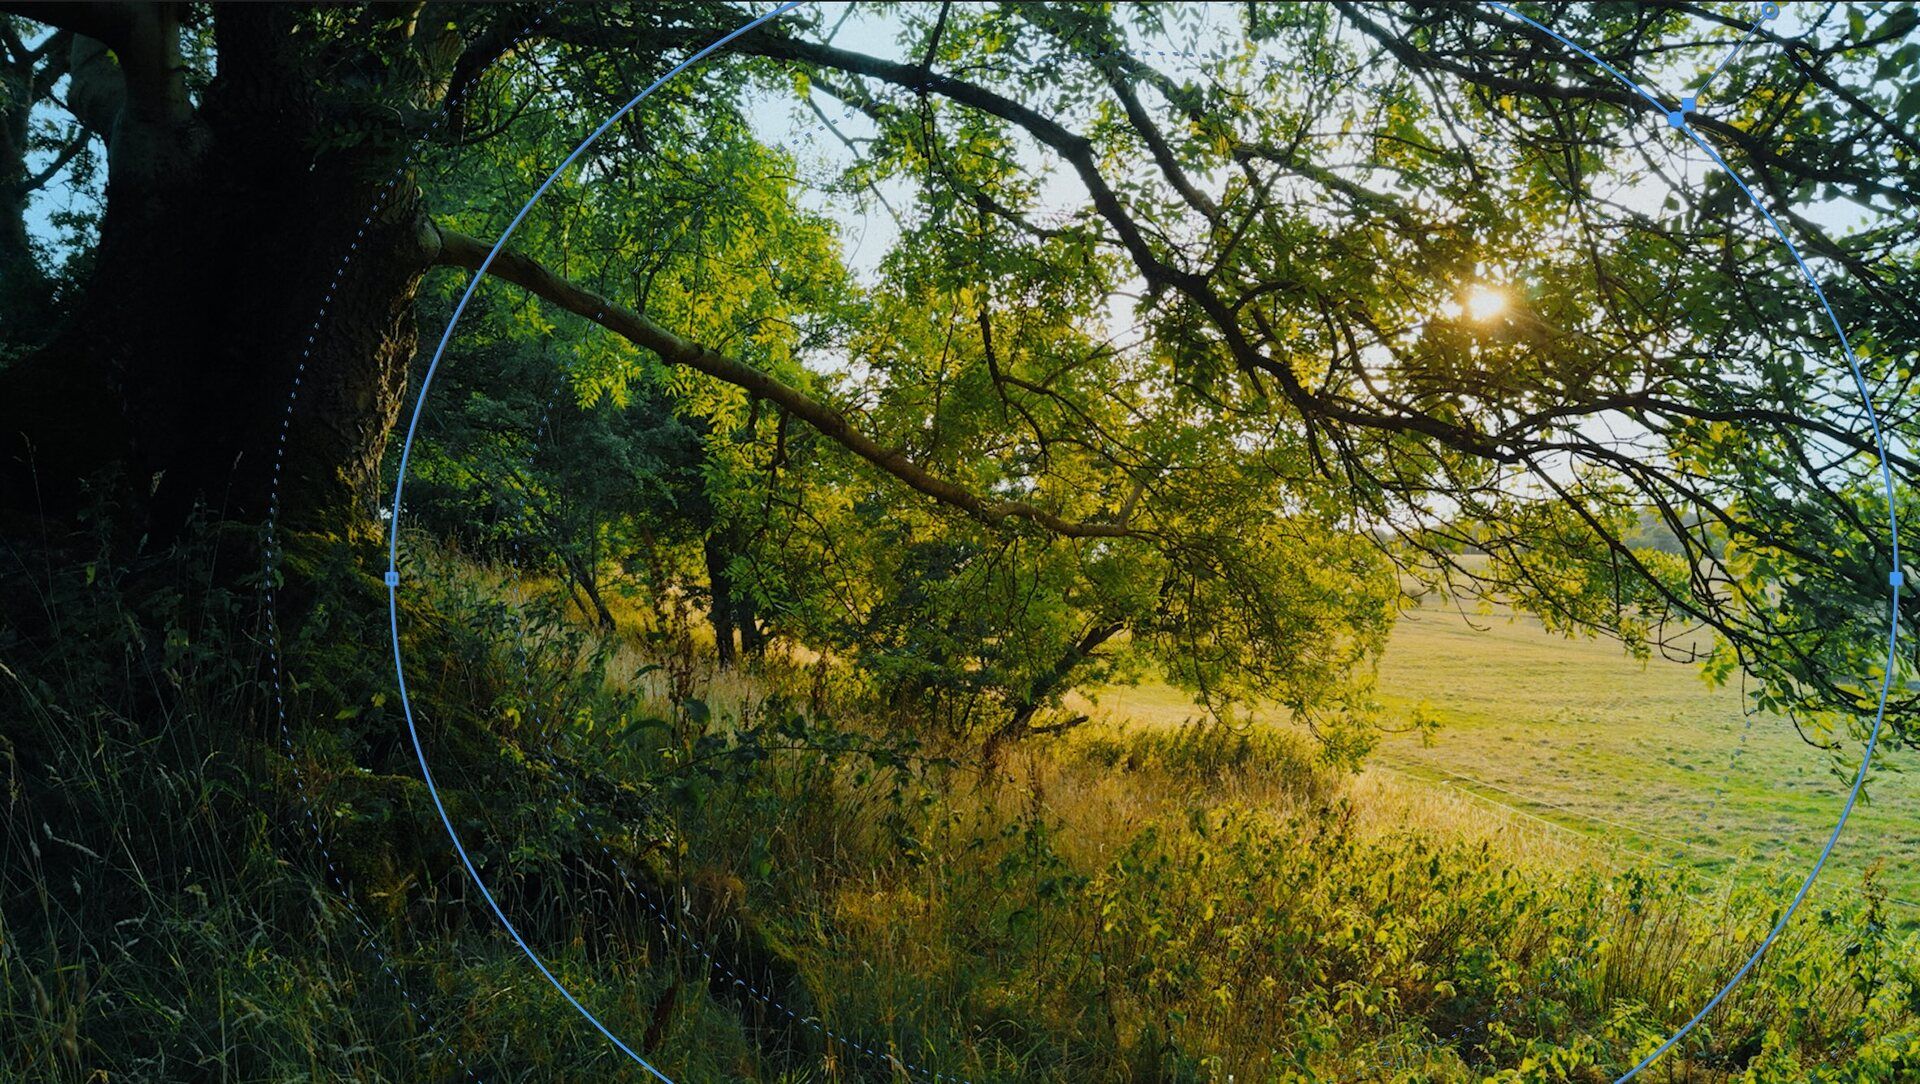
Added masks for enhanced viewer attention.
That’s it, not a very complicated edit at all!
Music & SFX
Most of the tracks and sound effects I use are from Musicbed. Their quality and variety are unmatched, and their AI search tool honestly saves me hours of scrolling through libraries.
If you want to try it out yourself, you can sign up below for a 14-day free trial. My personal playlist is live too, so you’ll be able to scroll through some of my favorite tracks!
Gear
iPhone 16 Pro
Polar Pro ND Filter
Settings
Exact camera settings from the Blackmagic Camera app
Apple ProRes 422
Apple LOG
5600k WB
180° Shutter Angle
60fps
4k Resolution
24 mm Lens
ISO 100
A Final Note
Thanks so much for being here, I genuinely appreciate every single reader.
If you ever have questions or ideas for future issues, feel free to shoot me a DM on Instagram!
Until next time,
Stefan
Minimal tools. Maximum creativity.
This post contains affiliate links, using them supports this newsletter at no extra cost to you. Win–win. 🫶🏼